
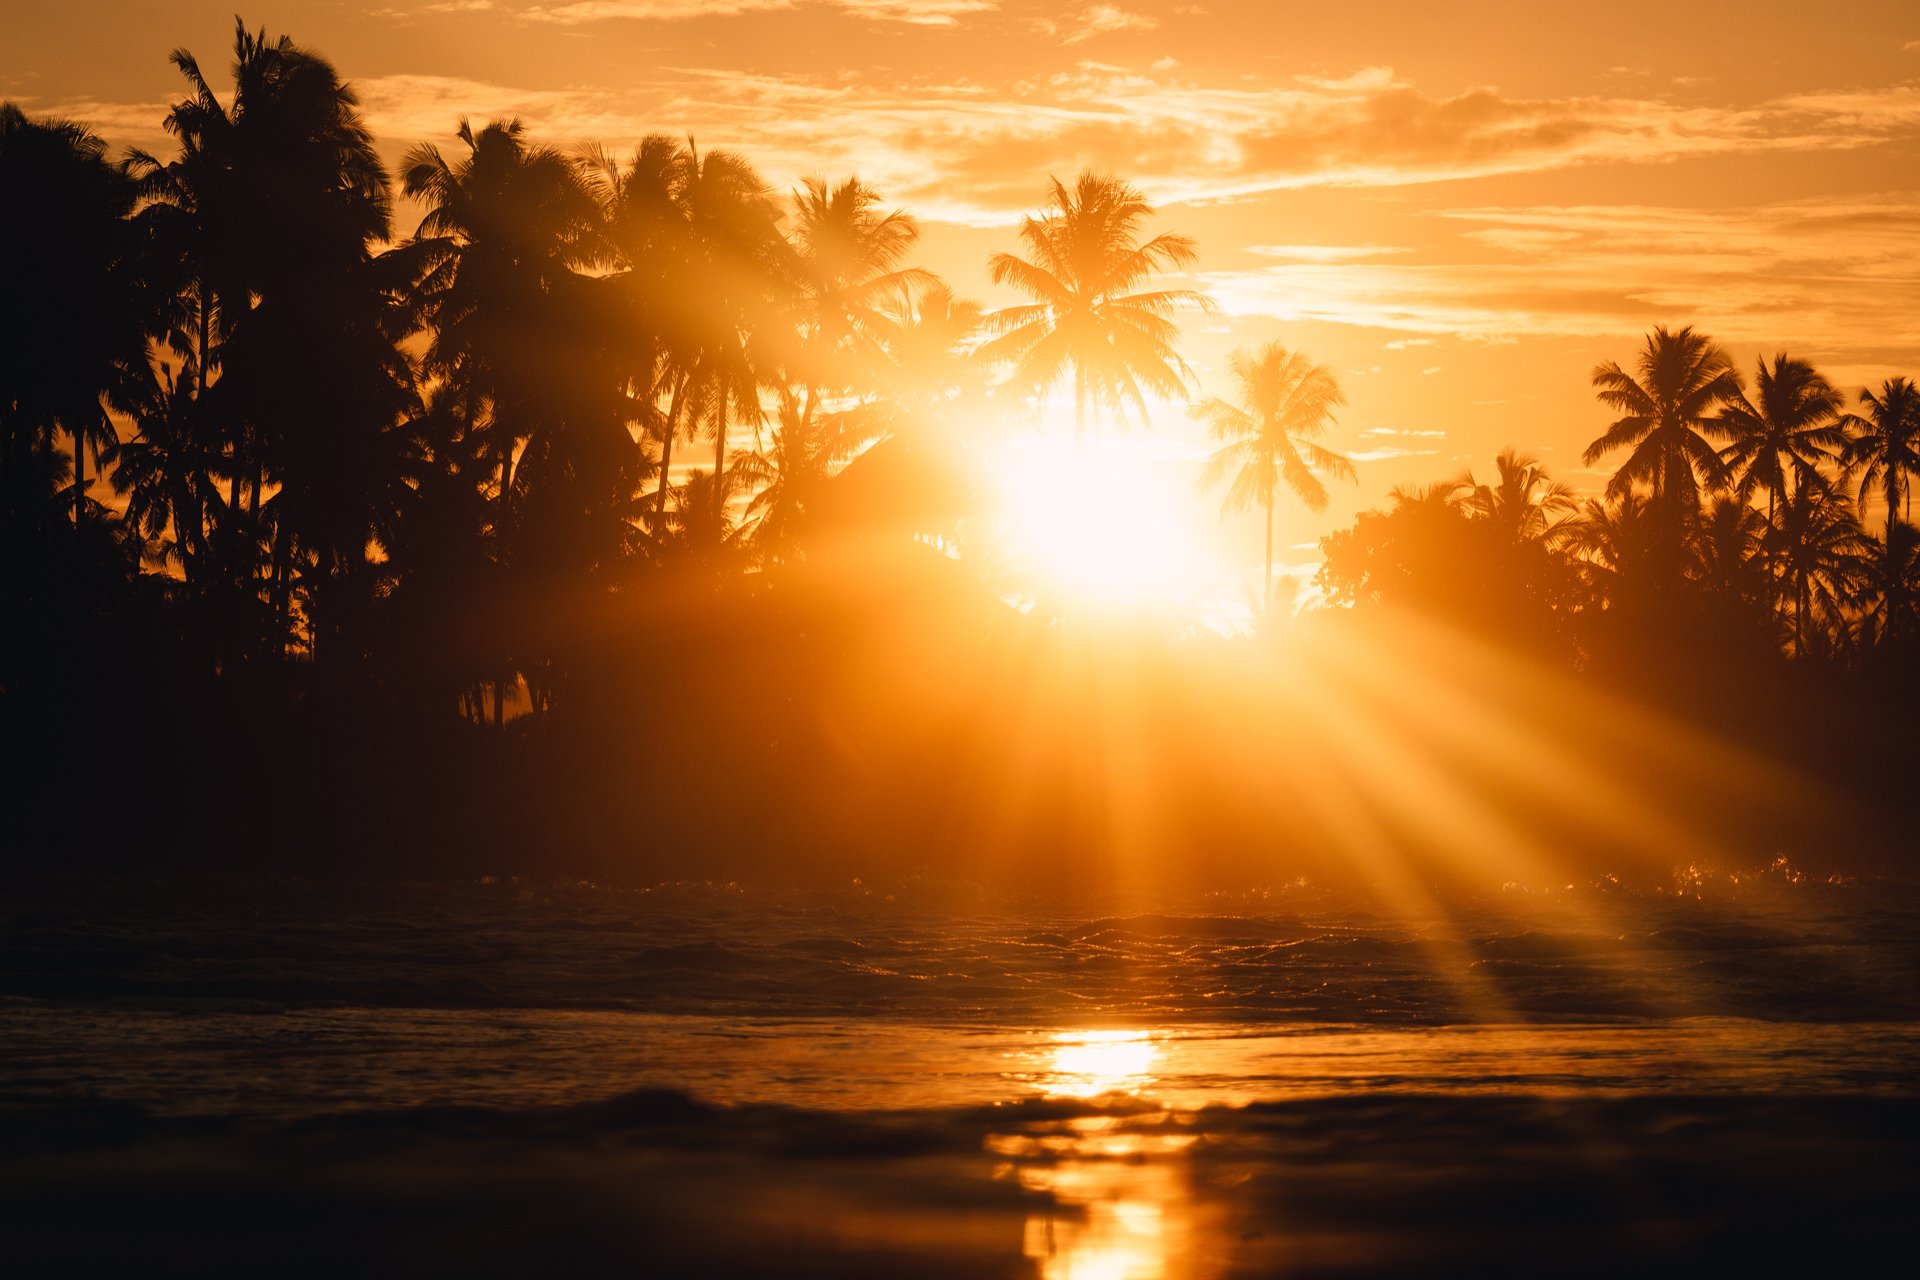
The Best Surf Waterhousings in the World - Liquideye
Photography has taken me on a wild path throughout my life, allowing me to explore places I would have only dreamed of as a child. As my career has evolved as a photographer, I always find myself returning to my passion - the ocean. The number one reason I picked up a camera was in the hope to take it into the water as soon as possible, and so naturally a waterhousing has been by my side ever since my journey began. I started with Liquideye 6 years back, and guess what, I’m still using them. I have put my various housings (three in total so far) through sketchy situations, even with a few hard encounters with reefs. To this day, none of my housings have ever let me down, and I have come to feel incredibly in tune with my Liquideye waterhousing. This blog will share my favorite things and thoughts about Liquideye from my time using them.
It’s been one magical ride ever since I started taking photos in the ocean. Footage by Jordan Godley
Made by surf photographers, for surf photographers
Liquideye was born from Philippe Chevodin, a surf photographer who used to shoot for top European magazines and surf brands from the mid 80’s onwards. He started making waterhousings for people in 1987, which is a testament to the time put into Liquideye ever since. Also, the current manager, Doby, is a highly talented photographer and waterman who has spent many years dedicated to the craft. This shines through in their product. Liquideye is not a ‘bang them out and sell em’ brand. They take time to test new ideas out in the water to make sure their housings are as ergonomic and practical in the water as possible. Every housing is made to order, and highly custom to the camera and users needs. Some other brands (not naming) seem to have gone more mainstream with their design and don’t feel as niche to surf as Liquideye does.
Compact and highly custom to the camera
These housings have become more and more compact over the years. For my Sony a7RIII, which is a very small mirrorless camera, the resulting housing from Liquideye is insanely compact. I remember when I switched from my Nikon setup to the Sony, the whole rig is just so much smaller and more manageable in the water and when traveling. People are always surprised when they see my housing setup, especially when I have my 70-200mm in the housing and it still looks really compact! As the housings are custom to each camera size, there is no wasted extra bulk/space, and the camera fits snug into the housing.
I recently did a one week trip to Sumatra and wanted to travel light, whilst still taking the gear I wanted. I took my Sony A7RIII, 70-200mm, Fisheye lens, Liquideye housing, fisheye port and 70-200mm port. All of this fit into my backpack! No need for a big bulky pelican case, just straight on the plane with everything on my back! This is the way I like to travel, with as little luggage as possible, and having compact gear allows for this.

My backpack from a recent trip to Sumatra. Everything I need fits in this one bag!
Every button I could ever need
It’s really important for me to have access to all the buttons I need when shooting in the water. Liquideye has nailed this as I can access any function I require. The way I shoot I like to not be fiddling around with settings too much in the water anyway, but when I do need to change things, it’s really easy. I can change my shutter speed, aperture and ISO pretty much without even having to look at what I’m doing - it’s that intuitive! I also set up my functions so I can move my focus point around when in the water, which has been a game changer.

With all the controls I need, I can concentrate on getting the shot with confidence. Photo by Jordan Godley
I like the the screw system!
This is what most people tell me they don’t like about Liquideye - the bolt screw system. I understand this does take more time to setup than the clip system of other brands, but my honest opinion is that I like the screw system. I love how flush the housing is once you screw the backplate on. There’s no bulky clips, just smooth flush edges, and you know that it won’t come undone. I have never had a leak from my backplate (or housing for that matter), and I recommend you to take the time to learn how to put the backplate and screws on properly to avoid any potential issues.
I have had a few friends shooting with clip systems, and they have accidentally knocked a clip off during shooting, which resulted in a flooded housing. This isn’t possible with the screw system. I have knocked my housing hard on reefs, and even chipped the edges, with no problems at all.
Ports, ports and more ports
I don’t know how many ports I have collected over the years, but it is a lot…. I have had many different lenses, and every time Liquideye has been able to accommodate with a neat port that works perfectly with the lens. I love shooting small prime lenses like a 50mm with a small port. The small port feels so natural with the housing and easy to use in the water. Having said that, my favorite setup recently has been with the 70-200mm, and the port for this is epic! The lens is the f4 version, which is smaller than the f2.8, and so the port is also nice and small (for a zoom lens port). I also shoot fisheye now and then, and I also love how compact and small the port is for that. There are options for extension rings, which allow you to use the same port with different lenses sometimes, but I like to have as little extra ‘stuff’ added onto my housing as possible (extension ring means another O-ring, which means another potential leak entry). It costs more, but I prefer to have the native port for the lens.

My fisheye and 70-200mm lens ports. I have a lot more ports, but these two I have been using a lot recently.
Pushing what’s possible
Over the years, it’s obvious to see how much work has gone into developing the design and ergonomics of the Liquideye housings. My first ever housing was pretty bulky, had a front loading plate with a fused port on it, and no function controls. It’s pretty obvious to see the progress in terms of design and function over the years. Fast-forward to now and Liquideye are still pushing to improve their housings constantly. They have just launched a bluetooth side grip giving you a two stage shutter button, AF button control, C1 (which you can customise to be movie record/stop) and zoom in and out on Sony PowerZoom lenses. My friend Jordan Godley tried this bluetooth grip and it worked super well for zooming out whilst filming.
It seems there are more new exciting things on the way but for now that’s all pretty hush hush, so watch this space!
Location
This obviously isn’t a plus for everyone, but the location of Liquideye is very handy for me. They are based in Bali, which is where I live. I can easily pop in to the workshop and get my housing serviced and pickup new parts etc. Being able to do this instead of lots of emails and waiting for shipping is a massive bonus for me. I am not saying you should move to Bali for this, but it’s a very nice convenience for me living here!
Please note, this post was not paid for by Liquideye and is my honest feedback.
10 Tips and Insights to Improve your Surf Photography
Surf and ocean photography is an exhilarating genre that requires passion, technical know-how, and the right gear to capture breathtaking moments. Whether you're a seasoned professional or an enthusiastic beginner, here are some tips to help you capture the perfect surf photo.
1) Know the Ocean
One of the most invaluable pieces of advice I can offer is to truly get to know your local surf spots. Take the time to understand how the waves break, where the currents are, the best tides etc. This knowledge will empower you to swim out confidently and position yourself strategically in the lineup. Be a student of the ocean, always observing and adapting to its ever-changing nature. Rip currents for example can potentially put you in danger, but they can also help you swim out to the lineup faster and easier. Lower tides often mean faster and hollower breaking waves, whereas higher tide may result in ‘fatter’ rolling waves. This is not always the case though and varies from spot to spot. Talking to experienced surfers who already know the spot can help massively in learning quickly about it’s characteristics.
Remember, the ocean is a dynamic and unpredictable subject. You can't simply expect the perfect shots to magically appear before your eyes. You have to actively engage with the environment, swim into the desired position, and anticipate the unfolding moments. If you want to capture a closer shot, don't hesitate to get up close and personal. Embrace the energy of the waves and the environment around you and it will reflect in your images.
However, it's crucial to know your limits and respect the ocean. The sea doesn't know your experience or fitness level, and it will be fast to give you a lesson or two about safety. If you feel that the conditions are too big or challenging for your comfort and safety, trust your instincts and refrain from swimming out. Your well-being always takes precedence and no shot is worth your life.
By cultivating a deep understanding of your local surf spots and staying attuned to the ever-shifting dynamics of the ocean, you will elevate your photography to new heights.

The ocean is a wild place. Take the time to learn about the spots you are shooting at.
Surfer - Dusty Payne
2) Shutter Speed
Slow and Fast: Experiment with different shutter speeds to achieve different effects. A slow shutter speed can create a sense of motion and convey the dynamic energy of breaking waves. It allows for stunning motion blur and emphasizes the flow of water. Slow shutter shots are possibly my favourite to shoot, as I feel they portray a magical world unseen by the human eye where time almost stands still and the elements seemingly become one. For slow shutter shots I am usually using a shutter around 1/5 to 1/20, but there is no magic recipe, and trial and error really comes into play here. Slow shutters work great in the early and late hours of the day when there is not much light available and the slow shutter will create a correct exposure. The colours are also emphasized using a slow shutter in the golden hours, which can produce stunning results in your images.
On the other end of the spectrum, a fast shutter speed freezes the action, capturing the movement of the wave in perfect sharpness and clarity. A rule of thumb if wanting extremely sharp images is to use a shutter speed of 1/1000 or faster. If you are shooting action surf and fast moving waves in the brighter hours of the day, a fast shutter will compliment the bright conditions and create extremely crisp results.

I used a slow shutter here to emphasize the fluidity of the wave and bring out more colour and contrast.

A fast shutter will ensure to freeze the action.
Surfer - Bleronk
3) Aperture
Mastering aperture settings can significantly enhance your wave photography. A shallow depth of field (low f-stop) isolates the subject from the background, whether it's a wave or a surfer, creating a dreamy and artistic effect. It directs the viewer's attention to the focal point of your image, adding a sense of intimacy and focus. A creamy and blurred foreground can also be achieved, which is extremely aesthetically pleasing in surf photography. An aperture of f/2.8 for example will achieve this desired effect. Conversely, a high f-stop (narrow aperture) increases the depth of field, ensuring that every detail of the wave is sharp and in focus. It's perfect for capturing sharp images of the entire scene and the grandeur of the ocean landscape. An aperture of f/11 for example will help achieve this goal.
I am always playing around with different apertures in the water to evoke different emotions and portray scenes and waves in a unique way. I urge you to also trial out different apertures and find out what works for you and your style over time.

The use of a low aperture here created some pleasant foreground bokeh and background blur, which helps make the wave stand out in the frame.
4) ISO
After covering how different shutter speeds and apertures effects our ocean images, we are left with ISO. This is arguably less of an important factor, however there are some fundamentals that I stick to when setting my ISO. If there is not much light available, such as at first light or on a cloudy day, I will opt for anywhere between ISO 400 to 800. Most cameras nowadays can handle higher ISO’s without creating much noise at all. I actually like the slight noise/grain that is produced at ISO 800 and it can add character to images, especially when shooting black and white. Ideally you will want to shoot a low ISO such as 100 or 200. These lower ISOs will ensure noise free images and improve the overall sharpness of your shot.
I usually set my ISO anywhere between 100 to 800 throughout a whole session. The available light and desired shutter speed and aperture will effect which ISO can be used. If you don’t want to worry about your ISO when you are in the water, I recommend setting your camera to Auto ISO and set the maximum limit to ISO 800. This will allow your camera to choose the ISO in relation to your aperture and shutter speed, without going above ISO 800 and potentially effecting your image quality.

Playing around with a high ISO of 4000 to capture the moonlight on the waves. This was half an hour before first light!
5) My Usual Settings
Although I do change up my settings and workflow in the water a lot, there are some things that I tend to stick to which work well for me.
I more often than not shoot in Shutter Priority mode and manual ISO. This means that I choose the shutter and ISO, and then let the camera work out the required aperture for a correctly exposed image. In the water I am mostly switching from shooting slow shutters when the light is low, to fast shutters when the light is bright. I will then set my ISO as discussed above to somewhere between ISO 100 and 800. I actually think about what aperture I would prefer when setting the ISO. If I set the ISO low, such as 100, the resulting aperture will most likely be low (such as f/2.8 or f/4), and if I set the ISO higher to 400, then my aperture will likely be higher (such as f/8 or f/11). I will decide what desired effect I want in my images as I’m shooting, and then adjust my settings accordingly.
I have, however, recently thought about having more control over my aperture than the technique above, and so I will play around with shooting in aperture priority mode and also manual mode. I will make sure to update soon when I trial out these settings!

I always make sure to check my camera is set up properly before going out for a swim.
6) Know Your Gear
Becoming familiar with your camera gear is crucial, especially when shooting in the water. The ability to quickly adjust settings without taking your eyes off the scene is invaluable. Take the time to learn the functions and controls of your camera and where the buttons are in relation to how you are holding the camera etc. For example, I pretty much know instinctively what every button on my water housing is for and how to interact with it without looking or loosing focus on the environment. Also, knowing where various settings are within your camera menus is important, as you do not want to be wasting time scrolling through menus when a potential shot is unfolding. This will enable you to make quick adjustments and seize decisive moments without hesitation.

I have been shooting with Sony equipment for the past 5 years and I now know it inside out. Click here to see my Sony Camera Gear.
7) Time of Day / Light and Shadow
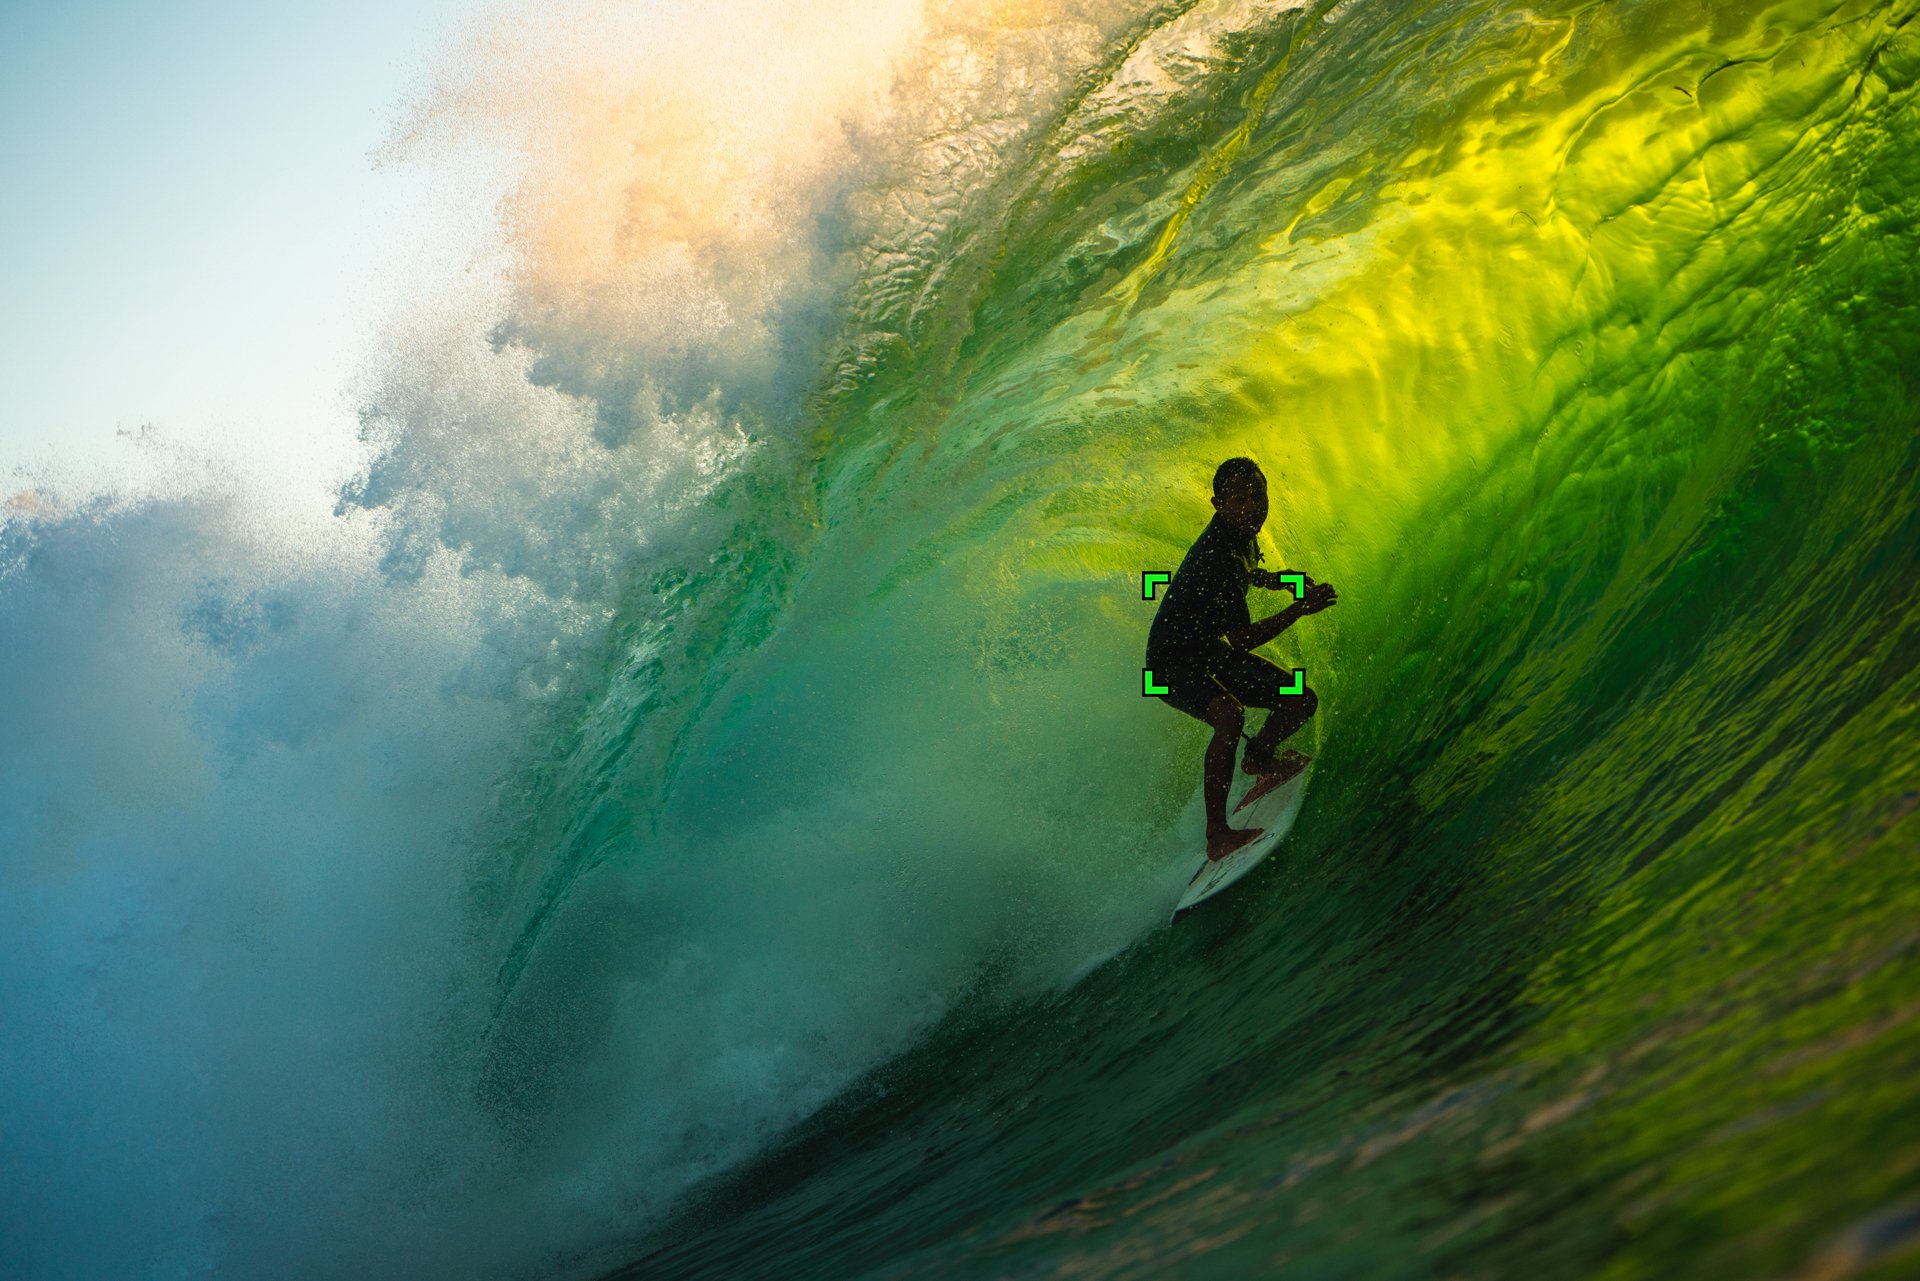
The time of day can make or break your wave and surf photos. The ethereal light during the golden hours provides soft, warm light that beautifully illuminate the waves and create magical scenes. The lower angle of the sun creates long shadows and adds depth to your images. Shooting during these times enhances the colors, textures, and overall mood of your photographs. Don't be afraid to venture out early in the morning or stay late in the evening to capture the moments that unfold. This doesn’t mean don’t ever shoot in the middle of the day, I do this all the time! A beautifully crystal blue image of a wave is stunning and very achievable when the sun is high in the sky. Also, when shooting underwater, the added light in the daytime can illuminate the underwater scene more and create wonderful blue hues.
The interplay of light and shadow can transform an ordinary wave photo into a captivating work of art. Experiment with shooting against the light to create striking silhouettes of surfers or capture the glow of backlit waves. Creating a silhouette of a surfer creates a sense of mystery, and as the surfer is not able to be identified, the viewer is able to put themselves in the scene more easily as if they were the surfer. Alternatively, observe how light interacts with the water's surface, emphasizing the texture, lines, and movement of the waves. Utilize shadows to add depth, drama, and contrast to your compositions.
I am an absolute sucker for a sunrise flare, it just looks so warm and healing.

Crystal blue hues under the midday sun.
8) Get Creative with Composition and Focal Lengths
Composition is key in surf photography. Explore different perspectives and angles to create visually engaging compositions. Get up close to the action to capture the raw power and details of the waves, or step back to include the surrounding elements and the vastness of the ocean. Experiment with leading lines to guide the viewer's gaze or employ the rule of thirds to create a sense of balance and harmony. Keep in mind that a well-composed photograph can convey emotions and tell a powerful story.
Different focal lengths will help you achieve such desired compositions. Longer focal lengths such as 85mm and 200mm will allow you to compress scenes in the water and create very abstract and artistic images. Wider focal lengths such as 12mm fisheye or 24mm allow you to get closer to the action and still capture a large span of the scene. A focal length of 50mm (on full frame) will create the most ‘normal to the viewers eye’ results, as it is close to the focal length of our human eye. This focal length is useful when wanting to create images that the viewer can interpret with ease and place themselves within.
Currently my favourite focal length is 200mm. It creates such fantastic compression and artistic results.
9) Focus Techniques
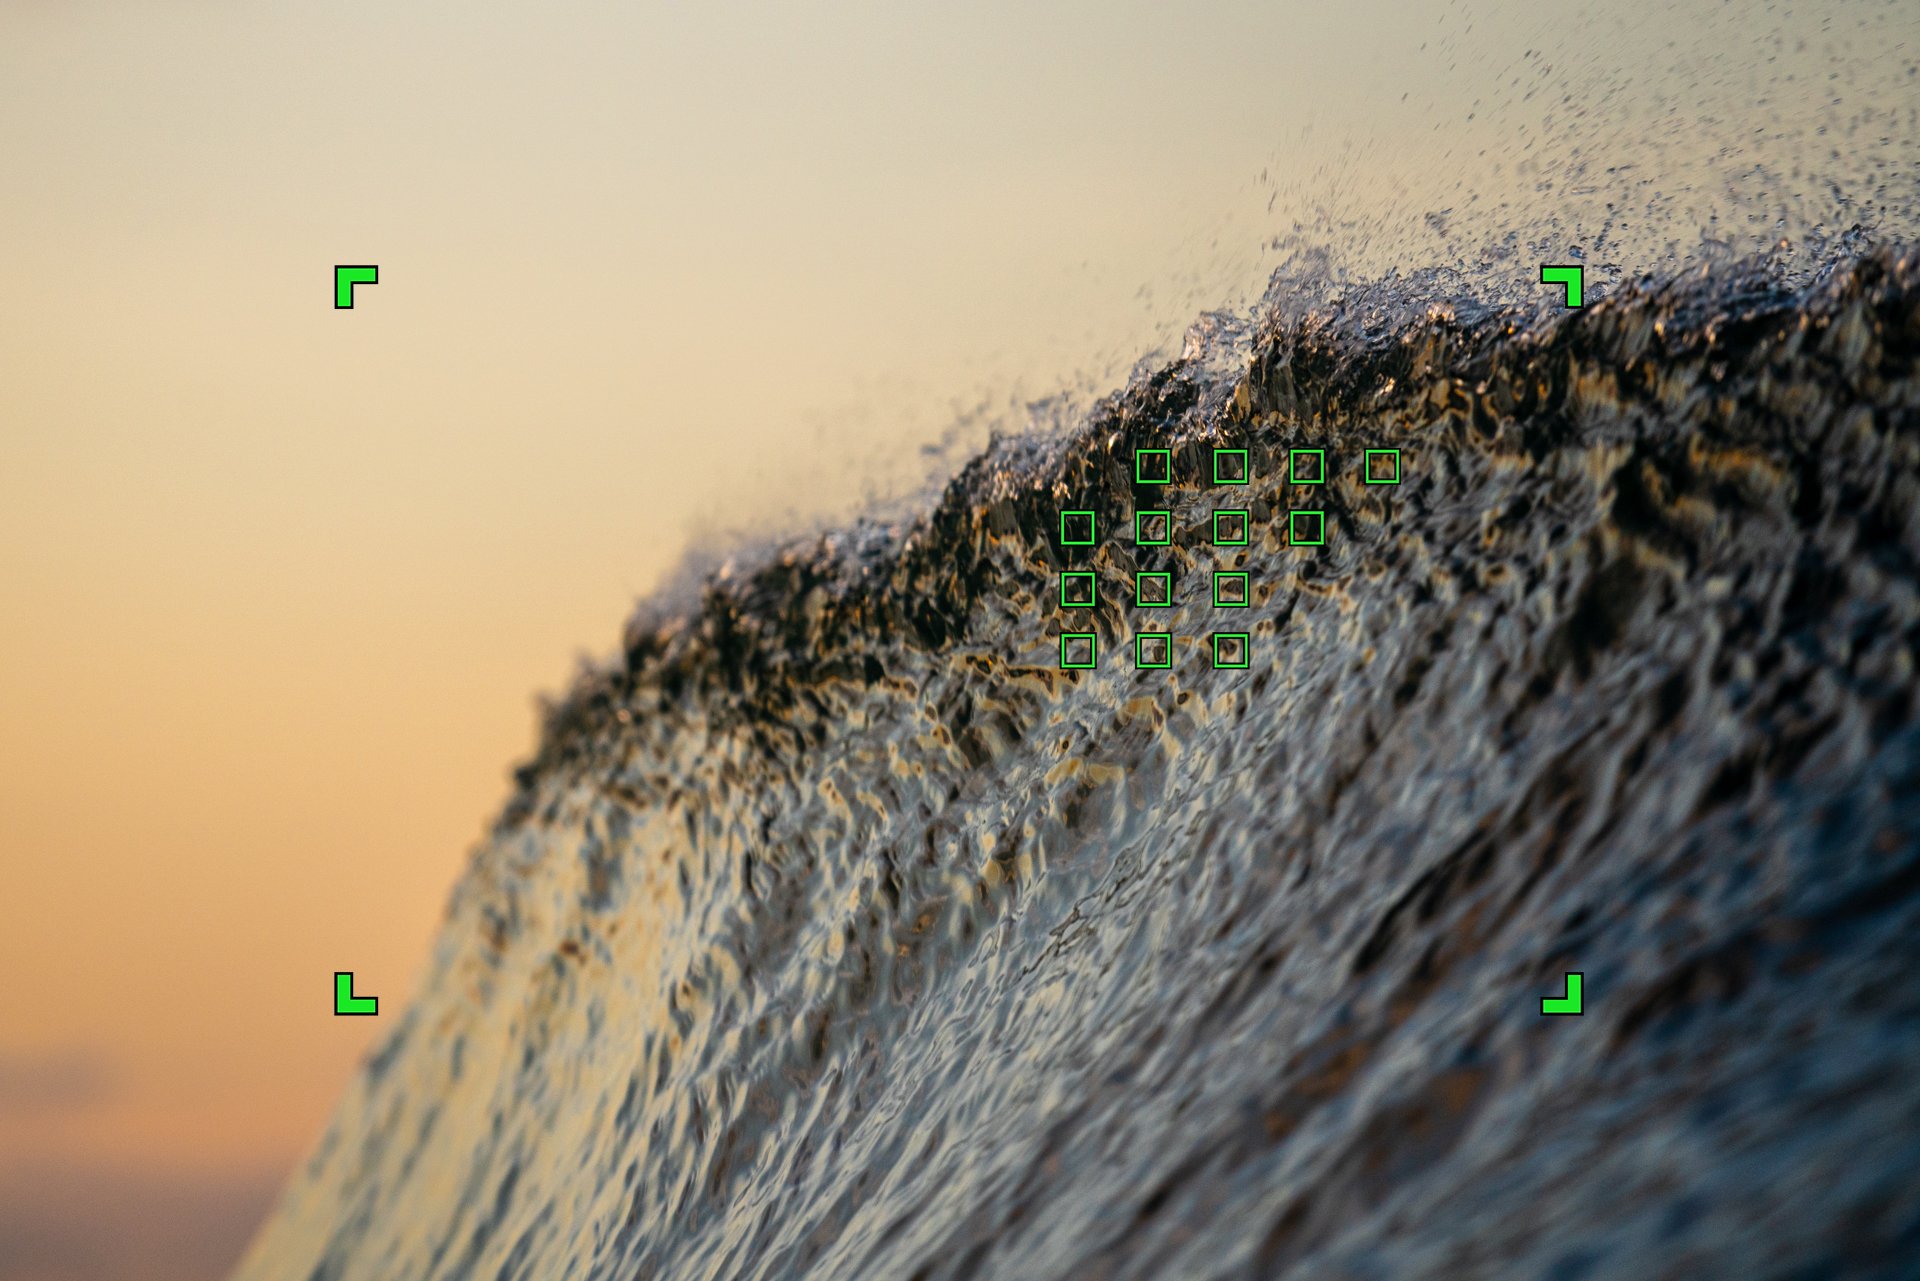
When talking about focus, it seems most people have a technique that works best for them. For me, I am usually using a medium spot focus point on my Sony A7RIII which I am able to move around the frame when in the water. This allows me to pinpoint a certain area in the frame where I think the focus should be. I couple this focus point with continuous focusing, which means the camera will continue to focus on the selected point whilst the shutter is half pressed or shooting images. I usually start to focus on a wave way before it has broken and track it as it moves. I have found that this ensures accurate focus when the wave breaks and the shutter is pressed.
Sometimes I will opt for a zone focus if the medium spot is struggling in low light, as I find the zone focus to be slightly faster at focusing.
When shooting fisheye I always use manual focus, which is partly as my fisheye lens is manual focus only…..However, as the fisheye lens is so wide, when you prefocus to around 4ft in-front of you and use a high aperture, the whole scene will be in focus. I like this way of focusing with the fisheye as it allows me to spend less time looking at my camera and more time simply getting into the right spot and soaking up the energy of a hollow barrel.
When shooting landscape scenes where half the frame is below the ocean’s surface, I may opt for single focus as opposed to continuous focus. This allows me to focus on the palm trees in the background for example, and then recompose half under the ocean’s surface before firing the shot. This way the camera will not try to refocus on the foreground before taking the shot.
I urge you to play around with different focusing modes on your camera, as it seems every camera has various best settings for accurate focus in the ocean.
Example of how I use a medium focus spot on my Sony A7RIII. I often move it around the frame whilst shooting.
Surfer - Mega Semadhi
Example of how I use zone focus in challenging situations.
10) Use Editing Software to Enhance Your Images
Post-processing has an important part to play with your surf and ocean photography. Editing software allows you to refine and enhance your wave photos, bringing out the best aspects of the photo. Adjustments in exposure, contrast, saturation, and sharpness can fine-tune your images and evoke the desired mood. However, remember to maintain a balance between enhancement and preserving the natural essence of the scene. Use editing as a tool to accentuate the beauty that already exists in your photographs. Being consistent in your editing will help you create a certain style over time. I know I have gone through many different phases with my editing, with much trial and error (and some cringey feelings when seeing over editing in the past). I have now come to a good point where I know what I want from my editing workflow and try my best not to over enhance the image whilst at the same time creating more mood and emotion through contrast and colours.
Remember to always shoot in RAW if you wish to make the most of editing, as there is much more image data within a RAW file compared to a JPEG. You will be able to recover shadows and highlights more easily and make more fine tuned adjustments to things like white balance and colour. Editing is a fantastic tool to express your own creativity, so develop a look that feels good to you and not what you think others will like.

Adding more contrast and colour pop in post production to bring out the vibrance of the scene.
In the end, capturing the perfect surf photo is a combination of artistic vision, technical knowledge, and creative experimentation. The more you get out there and practice, the more you will develop as a surf and ocean photographer. Remember to shoot what resonates with you and do not be influenced by social media and others to shoot in a way that is not aligned to you. Embrace the unpredictable nature of the ocean, respect its power, and capture it’s beauty through your individuality. Keep pushing your boundaries, and most importantly, enjoy the presence of being in the ocean. Happy shooting!
My Sony Camera Gear for Surf and Ocean Photography
As a professional photographer who specializes in surf and ocean photography, having the right camera gear is crucial to capturing the perfect shot. I am a firm believer in not relying heavily on the best and latest camera gear, but having confidence in your gear and knowing it inside out is absolutely fundamental. Over the years, I have tried and tested a variety of camera gear, and I have found that my Sony camera equipment is the perfect match for my needs as an ocean photographer. Sony have been pushing the limits of mirrorless technology over the past years, creating better and better cameras that are lightning fast at focusing and produce stunning image quality.
Here's a rundown of the Sony camera gear I use for shooting surf and ocean photography.
Sony A7R III
The Sony A7R III is my go-to camera for all my surf and ocean photography. I have been using it for 100% of my work for the past 5 years and still to this day it meets all of my needs for photography. This full-frame mirrorless camera has a 42.4-megapixel sensor, which allows me to capture stunning high-resolution images with excellent detail and clarity. Such high resolution gives me confidence for printing large fine art prints, with the flexibility to be able to crop a bit when required and still maintain excellent print quality. The camera also has very fast autofocus capabilities, which are important for tracking moving subjects like waves and surfers. The mirrorless system of the A7RIII in all honesty took me a long time to get used to after coming from a DSLR, but over time I grew to love it. The live viewfinder allows me to see the exact exposure of my images as I shoot them. This allows me to shoot with more accuracy and visualize the final edited image.

Sony A7RIII

My Sony A7RIII plus 70-200mm f/4
Sony 24-70mm f/2.8 GM
The Sony 24-70mm f/2.8 GM is my primary lens for shooting on the land (not of surf) for my personal and client based work. I use it in the water quite a lot, and although I do find it somewhat bulky, I can live with this due to the results I get from this lens. It's a versatile zoom lens that allows me to capture a range of shots from wide-angle to mid-range. The lens has a fast f/2.8 maximum aperture, which is ideal for shooting in low light conditions, and it produces sharp images with excellent contrast and color. If I am going out to shoot in the ocean and want to be able to get up close to the action but also have the option to draw back a bit, I will choose the 24-70.

Sony 24-70mm f/2.8 GM

Close to the action with the 24-70mm
Sony 70-200mm f/4 G
This lens has been my greatest surprise for in water photography and has swiftly become my favourite lens to shoot with. I originally bought it to shoot surf and waves from the land, however I found it did not have enough reach. I was thinking to sell it as I didn’t think I had a need for it, but then I thought it could be worth trying in the water. I am glad I did because I was blown away with the shots I could achieve. I always used to use an 85mm for more compressed and zoomed in water images, but this lens took things to another level for me. The 70-200mm focal range allows me to create incredible compression with the wave filling a good portion of the frame whilst creating stunning blurred backgrounds. I would say this is my go to option for creating more artistic photos in the ocean. On a good day I find I can shoot a great variety of artistic shots using the whole focal range in one session. The lens is also super lightweight for a telephoto and easy to maneuver in the water.

Sony 70-200mm f/4 G

Creating artistic depth and compression with the Sony 70-200mm f/4
Sony 200-600mm f/5.6-6.3 G
The Sony 200-600mm is my choice of lens for shooting surf and waves from land. It's a super-telephoto zoom lens that allows me to be extremely far back and still fill the frame with the action. If I want a bit more foreground or background, I use the 200mm end of the range, and then go up to usually between 400-600mm when needing the extra reach or to fill the frame. The lens produces extremely sharp images and I love sitting down to edit a ‘keeper’ from this lens. The lens also has an internal zoom, meaning the lens does not extend when zooming in and out. This is one of my favourite things about the lens as it makes it easier to manage such a large lens and shoot on the move with more ease.

Sony 200-600mm f/5.6-6.3 G

The incredible reach of the Sony 200-600mm
I also use a few other lenses for surf and ocean photography that are not Sony, such as a manual fisheye lens and a few old analogue lenses that I adapt onto my Sony A7RIII. However as this blog is about my Sony gear, I will cover the other lenses in a future blog post.
In conclusion, my Sony camera gear has been a game-changer for my surf and ocean photography. The combination of all my gear allows me to capture a wide variety of imagery both in and out of the water. Of course, there are more lenses on my wishlist and I hope to get a few of them soon (need to get back onto prime lenses!). If you're looking to take your surf and ocean photography to the next level, I highly recommend investing in Sony camera gear. If you have any questions please do not hesitate to get in contact with me :)